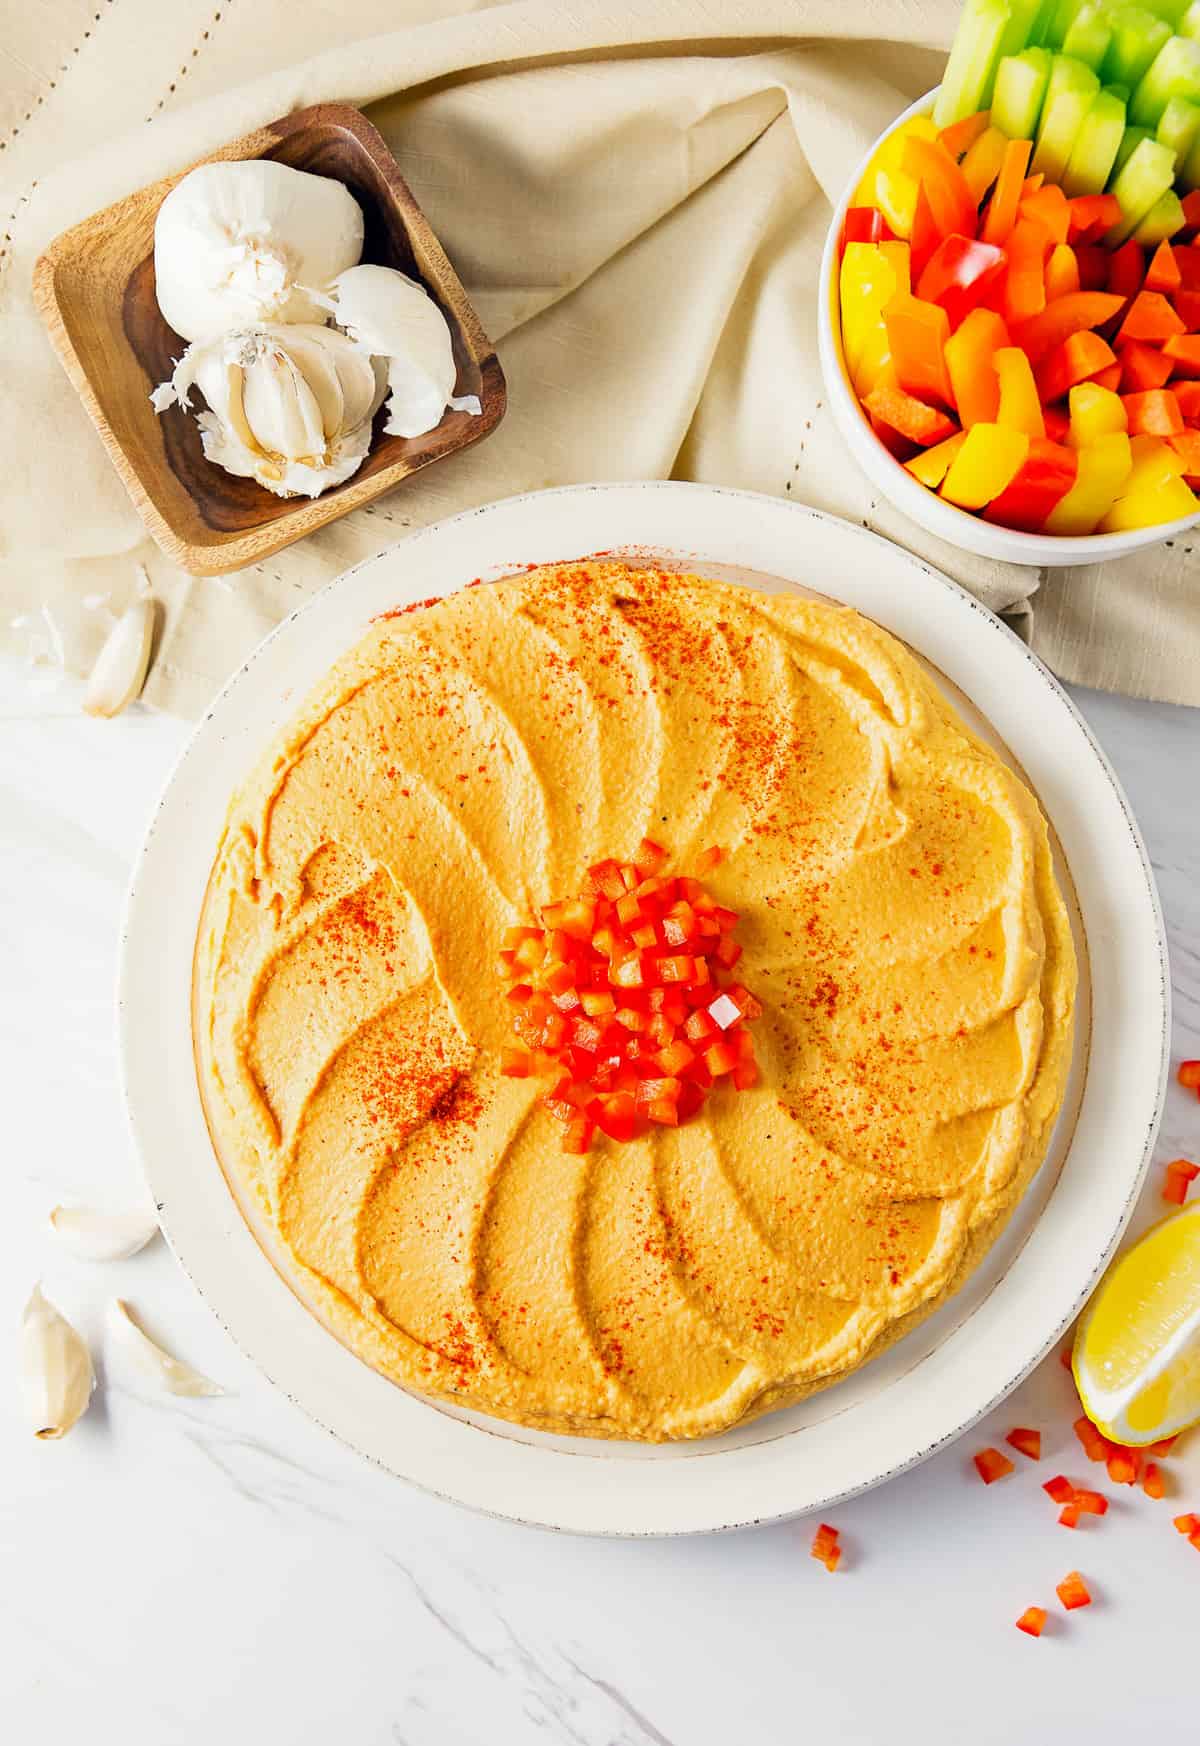
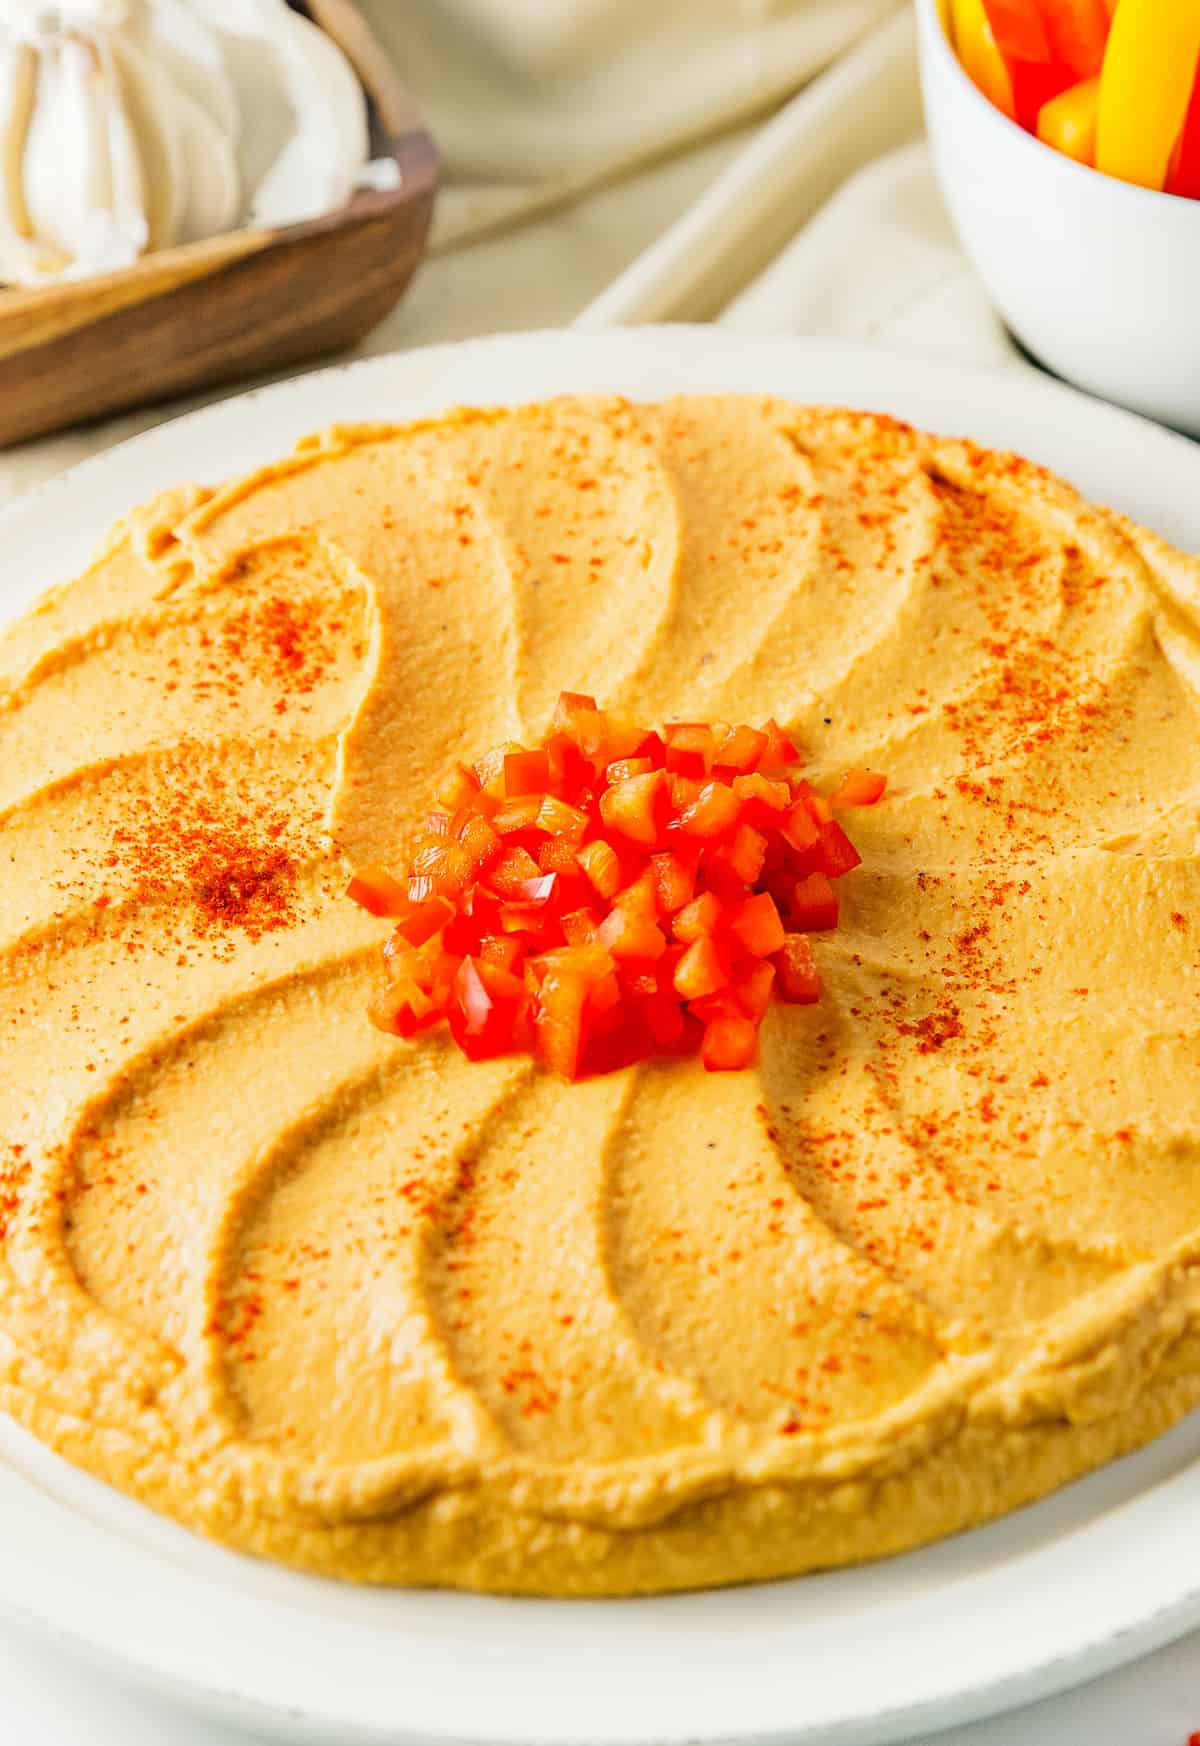
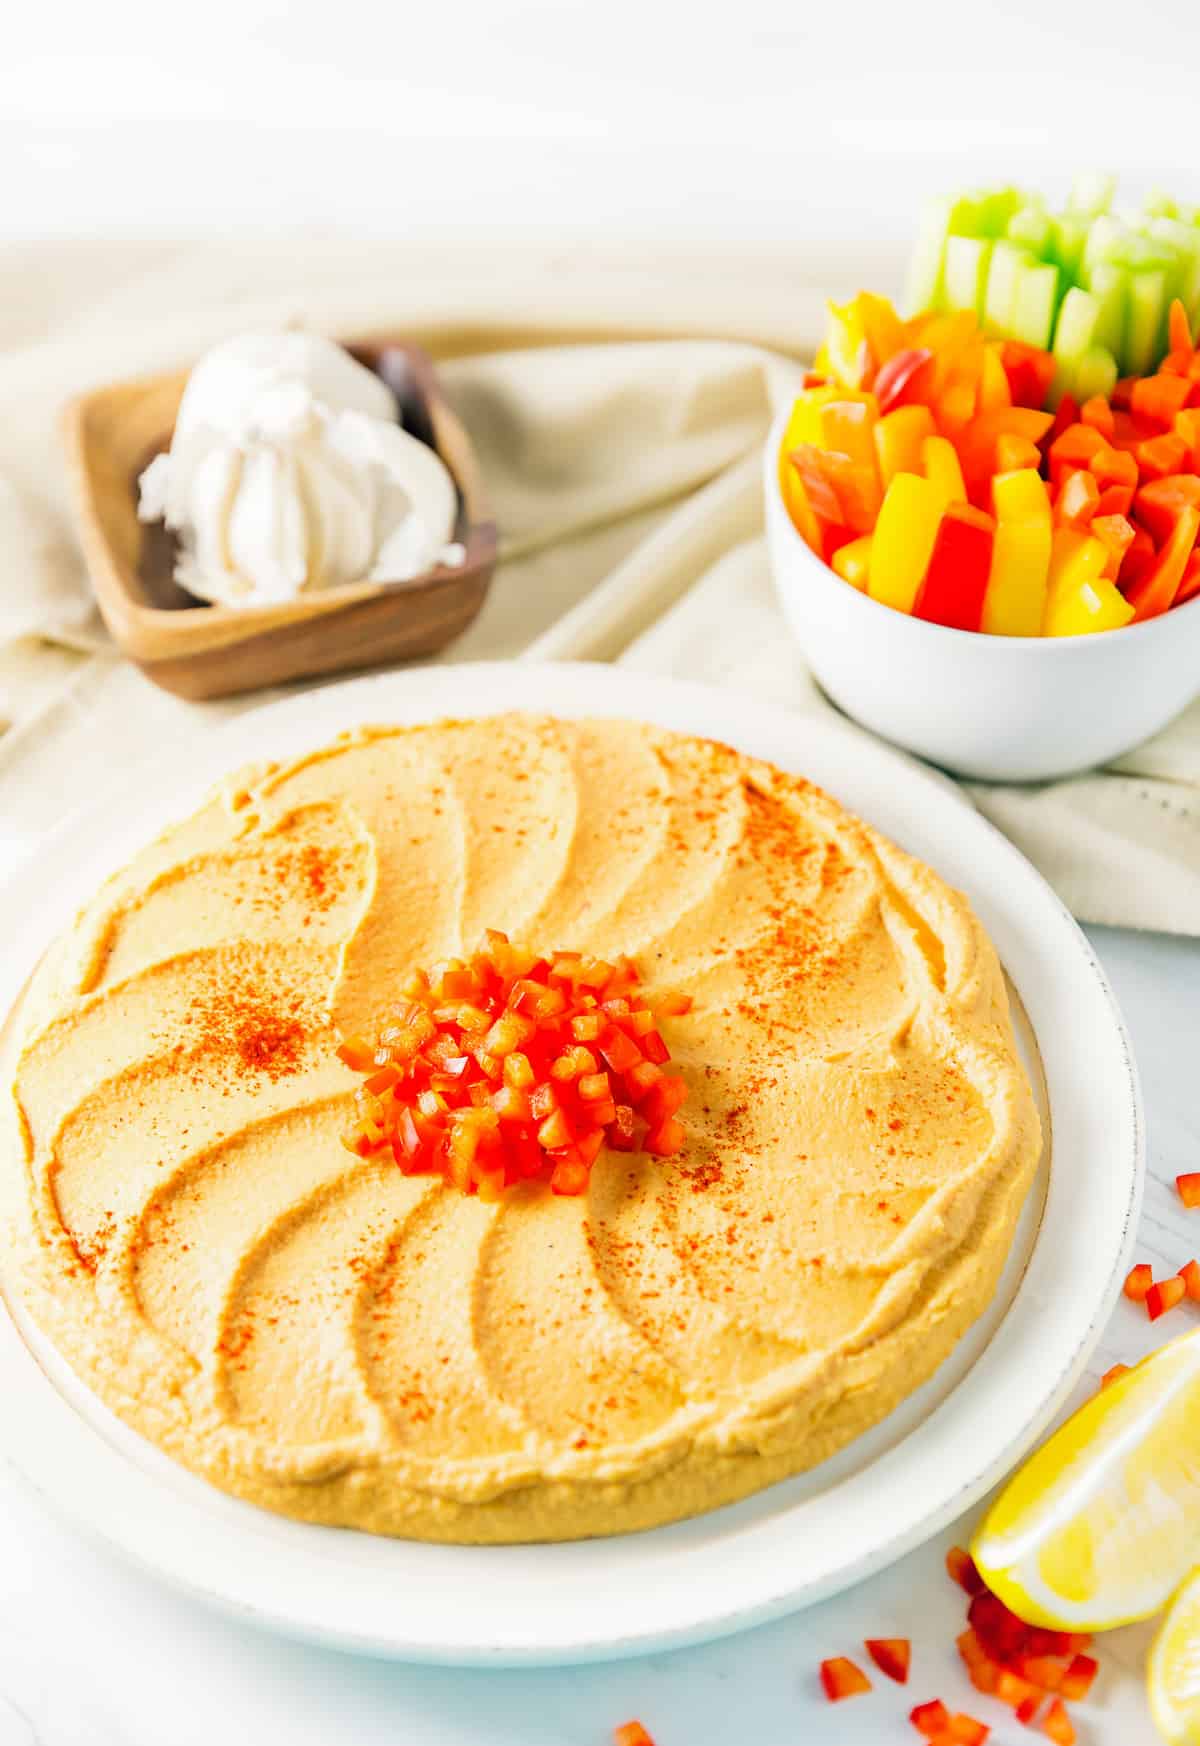
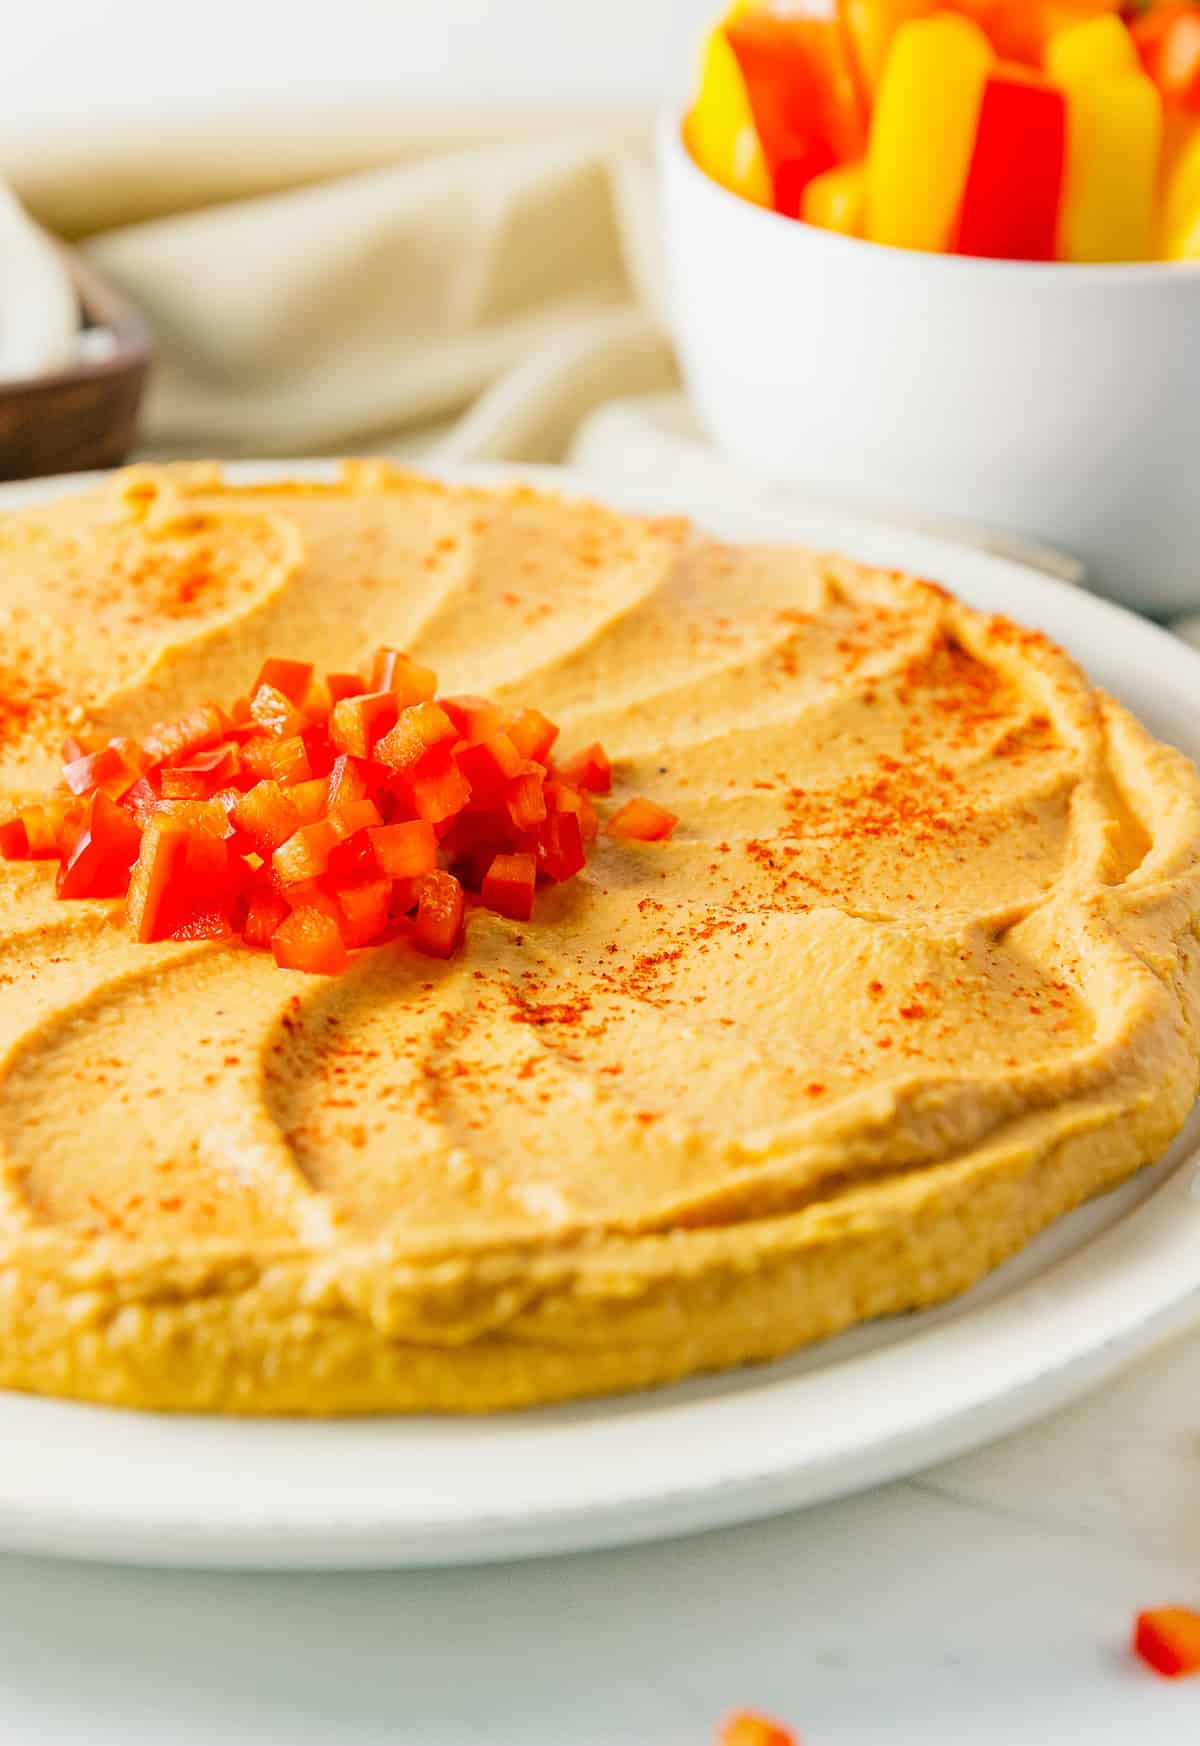
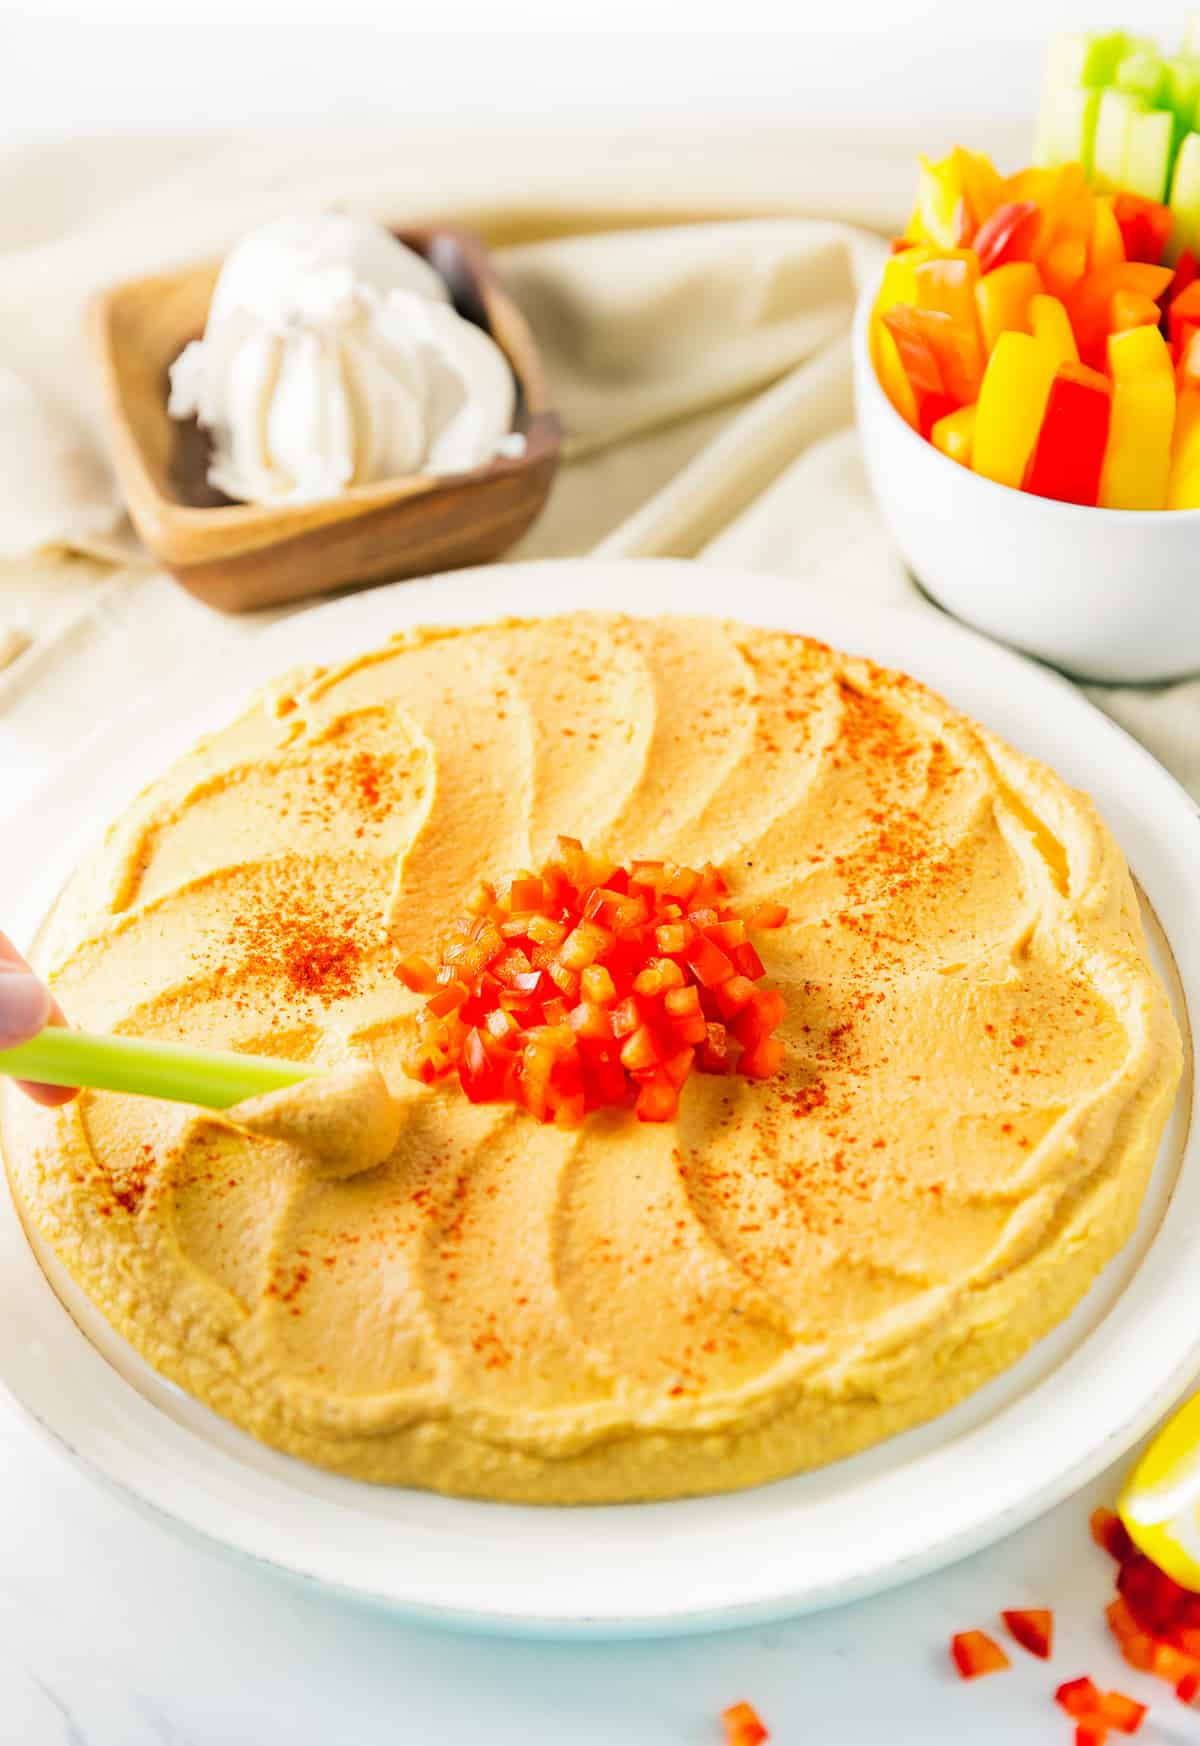
This creamy and velvety Roasted Red Pepper Hummus is perfectly accented with the rich flavor of roasted red peppers. The silky texture is superb, making it a delicious Whole Food Plant Based dip. Vegan, oil free, sugar free, no highly processed ingredients.
Hi, Ameera here!
If you love our traditional hummus recipe, then you are going to LOVE this variation. It is delicious, healthy, and lusciously smooth. It boasts a beautiful tangerine-orange color that will look gorgeous for entertaining or to simply dress up the dinner table; not to mention the obvious – just plain ole snacking.
We eat a lot of hummus in our family. We always have some sort of plain or flavored hummus in our fridge. It is one of those things that you need to have on hand when you are searching for a quick, healthy, and delicious snack. It is a lifesaver when you are hangry because it is so tasty and satisfying. It immediately squelches the stress of finding something fast when you need it.
Pressure cooker is key!
The key to a great hummus is finding a fast and easy way to remove the chickpea outer shell. We like to used dry chickpeas because they are so economical. Putting the dry chickpeas in a pressure cooker, bean cooker, or instant pot does the trick very nicely. The outer shell is pretty much destroyed ensuring a very smooth hummus.
Once you have processed the chickpeas in a pressure cooker, the rest is a piece of cake. Don’t forget to reserve some of the water that you used to cook the chickpeas in as this water helps ensure a very smooth consistency.
Tip: Make it when it’s warm
Another awesome tip is to make the hummus while the cooked chickpeas are still warm (not hot). This allows you to create a very smooth hummus. Once the hummus gets cold, it firms up and this makes it harder to get that ultra-smooth consistency.
For this recipe, we used a 12-ounce jar of roasted red peppers. We love having jars of roasted red peppers on hand. Just watch your ingredient labels to ensure that there is no oil and that they are Whole Food Plant Based compliant. You can always roast your own red peppers if you wish.
Just cut the tops off of 2 large red peppers and remove the seeds, cut them into large strips, then place them on a foil lined baking sheet. Turn the broiler onto high. Then place the baking sheet about 6 inches from the broiler and broil them for 5 to 8 minutes until the skins are blistered and burnt. Then immediately place them into a glass bowl, cover with plastic wrap and allow to sit for 30 minutes. Then carefully pinch off and remove the outer skin (discard the skins) before tossing into the food processor when making the hummus.
We love to make all types of hummus flavors. Stay tuned for more flavored hummus recipes to come!
Robin here!
I am in love with this Roasted Red Pepper Hummus. It is so tasty and is also an excellent source of fiber, healthy fats, and has been known to help control blood sugar. Hummus also promotes the growth of healthy bacteria in the colon. It is a good source of plant protein and contains a wide variety of vitamins and minerals including vitamin K, zinc, iron, magnesium and vitamin C. It has also been associated with reducing the symptoms associated with rheumatoid arthritis.
What is your favorite hummus flavor?

Products used:
- Pressure cooker (Traditional Hummus Recipe)
- Food processor
Roasted Red Pepper Hummus
- Yield: 5 Cups 1x
- Category: Appetizer
- Cuisine: Middle Eastern
Description
This creamy and velvety Roasted Red Pepper Hummus is perfectly accented with the rich flavor of roasted red peppers. The silky texture is superb, making it a delicious Whole Food Plant Based dip. Vegan, oil free, refined sugar free, no highly processed ingredients.
Ingredients
- 1 ½ cups dried chickpeas (cooked in a pressure cooker)
- ½ cup of reserved warm bean water from the pressure cooker
- ½ cup tahini (room temperature)
- ¼ cup lemon juice (plus a little more to taste)
- 1 – [ 12 oz. jar ] roasted red peppers, drained
- 1 teaspoon garlic powder
- 1 ½ teaspoon sea salt (+/-)
- Water, as needed
Instructions
- Cook chickpeas in a pressure cooker according to Instant Pot directions.
- Once done, immediately do a quick release. Drain the cooked chickpeas into a strainer over a bowl to collect the warm bean water. Important Note: You want to keep the warm bean water. Allow the beans to cool a little. You want them warm, but not hot when making hummus. Set aside.
- Add the ½ cup tahini and ½ cup of the warm bean water (from the pressure cooker) into a food processor. Blend at a high speed for about 4 minutes.
- Add all the remaining ingredients into the food processor and blend at a high speed for 5 minutes.
- Check the consistency. The hummus will be warm. We want the hummus to be very loose. Add more water until the consistency of cake batter. The consistency of the hummus should be pourable into a glass bowl with the help of a rubber spatula. The hummus will firm up in the refrigerator when cold.
- Taste and adjust the flavor by adding more sea salt or lemon juice.
Pour in a glass bowl, cover, and refrigerator.
Notes
- Using the reserved, warm bean water from the pressure cooker allows the beans and ingredients to blend well and become very smooth.
- We like to make the hummus right after the beans come out of the pressure cooker and have slightly cooled down. Again, we make the hummus while the beans are still warm. Again, this helps the hummus come together nicely and makes for a smooth loose consistency. It will firm up in the refrigerator.
- Canned chickpeas (2) will work as well, but the consistency of the hummus will have a little more chunkiness to it since the outer shell of the chickpeas does not break down as much as when they are cooked in a bean pressure cooker. In our opinion, nothing compares to cooking chickpeas in a pressure cooker when making homemade hummus. It is a great investment if you eat a lot of beans like we do.
- Freshly squeezed lemons are ideal; however, I have found that bottled lemon juice works equally well. We tend to use the bottled lemon juice more often than freshly squeezed lemons.
- Also, this hummus makes a great sandwich spread, a nice healthy alternative to mayonnaise.
- It also makes a great sauce when heated and served over freshly cooked pasta (gluten-free for us).
- Sea Salt: Sometimes, we make the hummus just a teeny tiny . . . tiny bit saltier than you would think normal as it just ends up being the perfect flavor for dipping fresh veggies.
Middle Eastern Style: Spread the hummus on a round or oval flat plate; make circular swirls with a spoon to create dimension. Think, “swirl ridges” like frosting a cake. Place a light drizzle of olive oil over the hummus. Garnish with a very light sprinkle of paprika, cayenne, or cumin and/or place a few whole chickpeas or olives in the center. Serve with pita triangles, vegetables, or flatbread. Since we started eating WFPB (Whole Food Plant Based), we no longer use olive oil when serving.
Storage: Store in a glass container in the fridge. Eat within one week.
This is the best!!! I cant stop eating it.
I do not have a pressure cooker (I’ve been good Santa) I nuked my canned chickpeas for 3 minutes, then used them as directed. Both of my daughter-in-laws asked for the recipe.
Hi there Kerry,
YAYYYY!!! We are thrilled that you enjoyed this recipe and your daughter-in-laws asked for the recipe!!! Thank you so much! 🙂
-Ameera and Robin