Mexican Bean Burger! Looking for a lip-smacking bean burger? Look no further, we’ve got a delicious and flavorful burger coming in hot just for you!
Healthy, easy, and satisfying, this Mexican Bean Burger is boasting all the must haves: a pow of spices, perfect texture, and oh-so-delicious. Your family will be seated at the table in a flash for these fun, flavorful, and festive burgers.
Whole Food Plant Based, Vegan, plant based, oil free, refined sugar free, no highly processed ingredients and gluten free.
Hi there, Ameera here!
These burgers are IT! We totally went gah-gah over them, and thoroughly enjoyed every last bite. We made three festive and delicious options to choose from or you can simply create your own delicious toppings.
You can’t wait for you to try them!
Tips for Success:
- Flavor Profile: These Mexican Bean Burgers are filled with delicious Southwestern spices. Not mushy, not dry, just right, so yummy!
- Burger Formation: Really pack the burger tightly in your hand to form a firm cohesive ball, then press down while still in your hands and form a flattened disk. Take the time to really smooth out the sides. This helps prevent the disk from cracking while it is baking. It will crack a tiny bit, but you want to make sure you want to shore up the edges before it goes in the oven. This makes 4 to 5 burgers.
- Pro Tip: After shaping the burgers into a smooth cohesive disk, dampen your hands and continue to shape into a smooth disk. This will help prevent the sides of the burger from cracking.
- Burger Texture: We did multiple kitchen tests. We do not like mushy burgers. Baking the burger for 20 minutes on the first side, this burger is somewhat slightly drier in comparison to other veggie burgers which was exactly the goal with this burger. It’s not a dry burger by any means, but it is definitely not mushy.
- Low-Fat Burger: Our goal was to create a great tasting low-fat burger that was not mushy. Because we are not adding any fat to the burger, the burger would ever so slightly break apart while eating – not in an obvious way, but just slightly. This did not bother us at all, but we could see how some might notice this and not be happy. If you want to ensure that the burger holds together firmly with every single bite, then we suggest adding a tablespoon of cashew butter in Step 7.
- Thickness of the burger: The thickness of this burger is another area within your control. We made multiple kitchen tests and preferred a 1-inch thick burger. You can make them thicker, but you may need to increase your oven time to 20 minutes, then flip and another 20 minutes.
- Salsa: Feel free to use your favorite salsa, either mild or medium.
- Processing the Salsa: The reason we process the salsa in the food processor is to eliminate any chunky pieces of tomato, peppers and/or onions. Chunky pieces can cause the burger to crack and split apart while baking. It also helps the flaxseed meal to bind to the liquid creating a “flaxseed egg” type mixture that will make the burger stay together. Make sure you scrape all of it out of the food processor. It will look like a paste.
- Regular Chili Powder: Feel free to use your favorite chili powder, just be sure to select a mild one and not one that has a lot of heat to it. Unless of course, if you prefer a lot of heat in your burger.
- Beans: We kitchen tested this recipe using a variety of beans. We found the best combination was a can of black bean and a can of chickpea. The black beans become very mushy, but the chickpeas do not become overly mushy which is the perfect combination. If you are using chickpeas that you cooked from dry beans, then use drier cooked chickpeas and not super mushy ones that you would typically use to make hummus.
- Corn Tortillas/Tortilla Chips: Feel free to use your favorite corn tortillas or tortilla chips. If using tortillas (not already crisp), then you will need to bake them first until very crisp (like tortilla chips), then after they have cooled, you can process them in the food processor or crush them by hand. Process enough to arrive at ½ cup crushed tortillas/tortilla chips. You do not want a fine powder; you do want them crushed up with pieces no bigger than a grain of rice.
- Burger Options: You can top these delicious burgers with anything you like: avocado slices, guacamole, salsa, red onions, lettuce, tomatoes, etc. We created three yummy options. You can do one option, two options, or all three options, or create your own. These burgers make a fun and festive burger bar for parties.
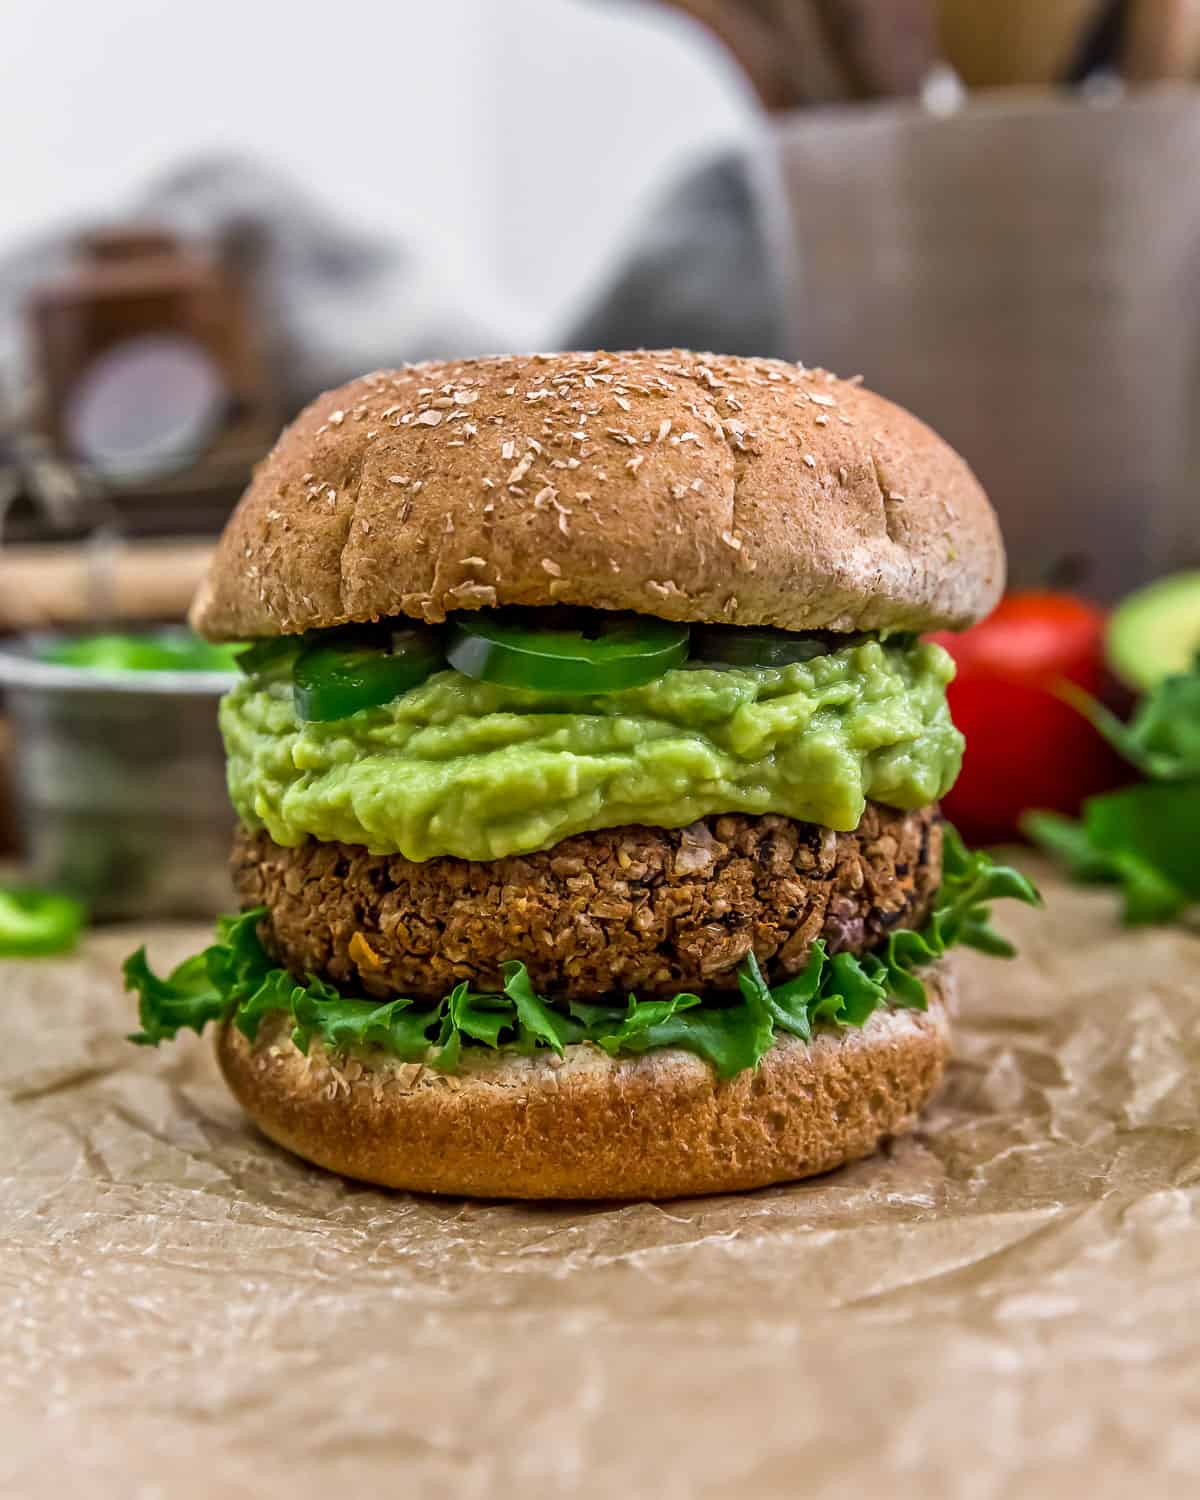
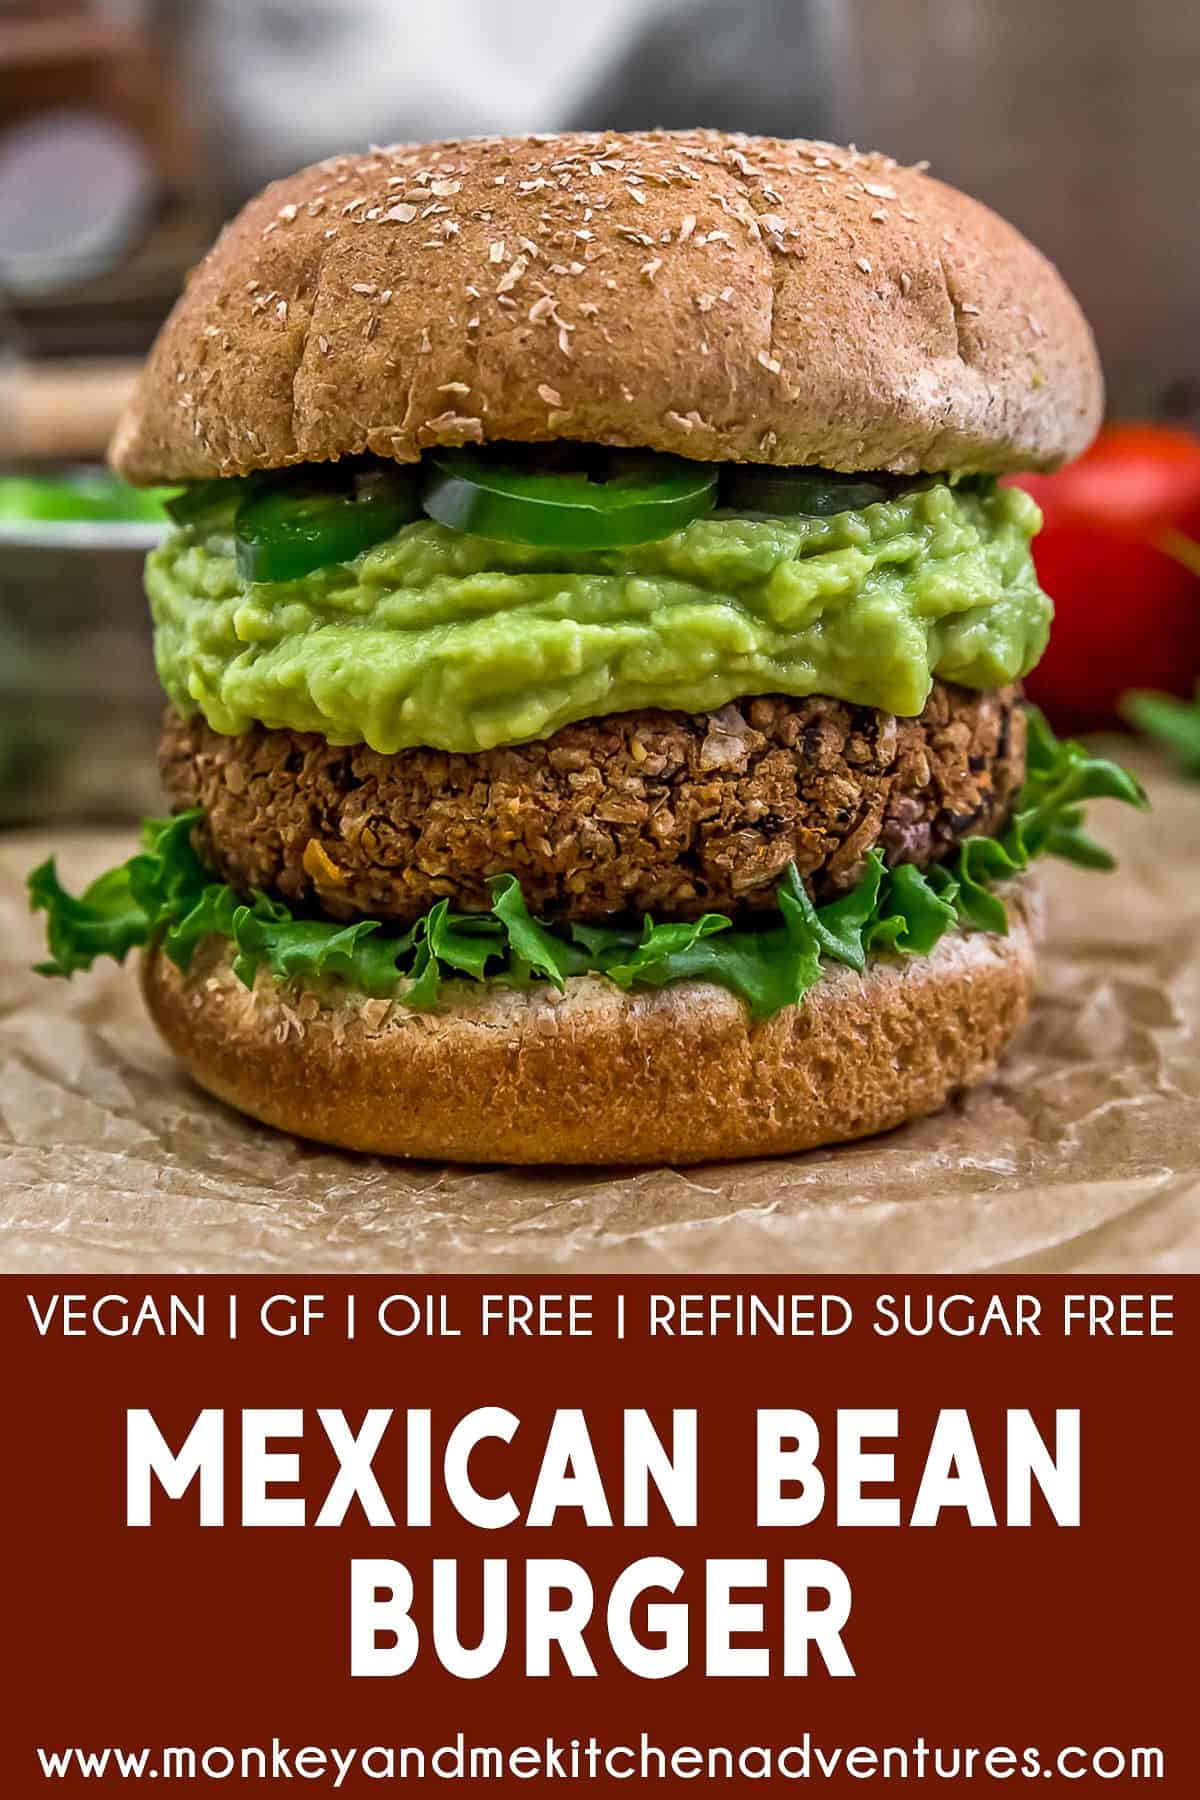
- Burger Option #1 – Avocado Burger: We mashed an avocado really well, then seasoned it with some garlic powder, sea salt, and a hint of lime juice. We laid down some lettuce on a burger bun bottom, followed by the Mexican Bean Burger and a generous portion of the avocado mixture and a few thinly sliced jalapeno pepper rings, then topped with the burger bun.
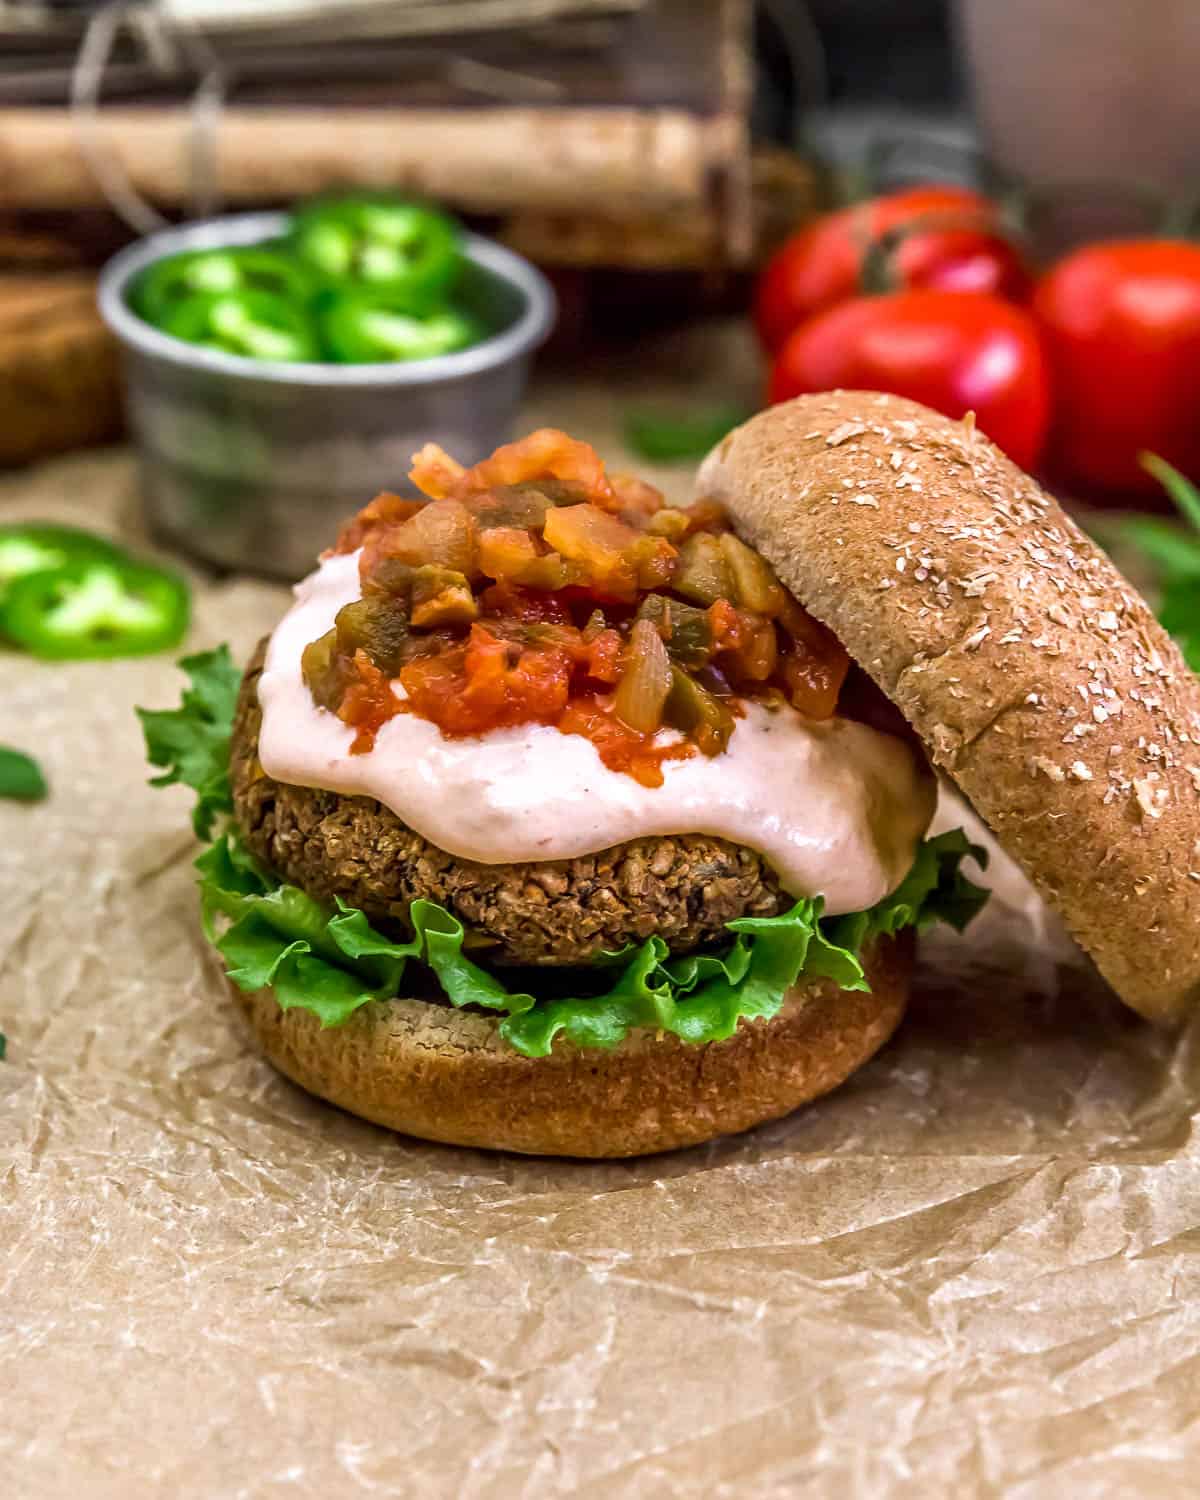
- Burger Option #2 – Sour Cream Salsa Burger: We used our Vegan Sour Cream (or your favorite vegan sour cream), then mixed in some salsa (with the liquid strained out). There is no recipe for this. Just guess how much sour cream you may want to use, then add the strained salsa and mix well. We laid down some lettuce on a burger bun bottom, followed by the Mexican Bean Burger and a generous portion of the sour cream/salsa mix and then topped with a tablespoon of strained salsa, then topped with the burger bun.
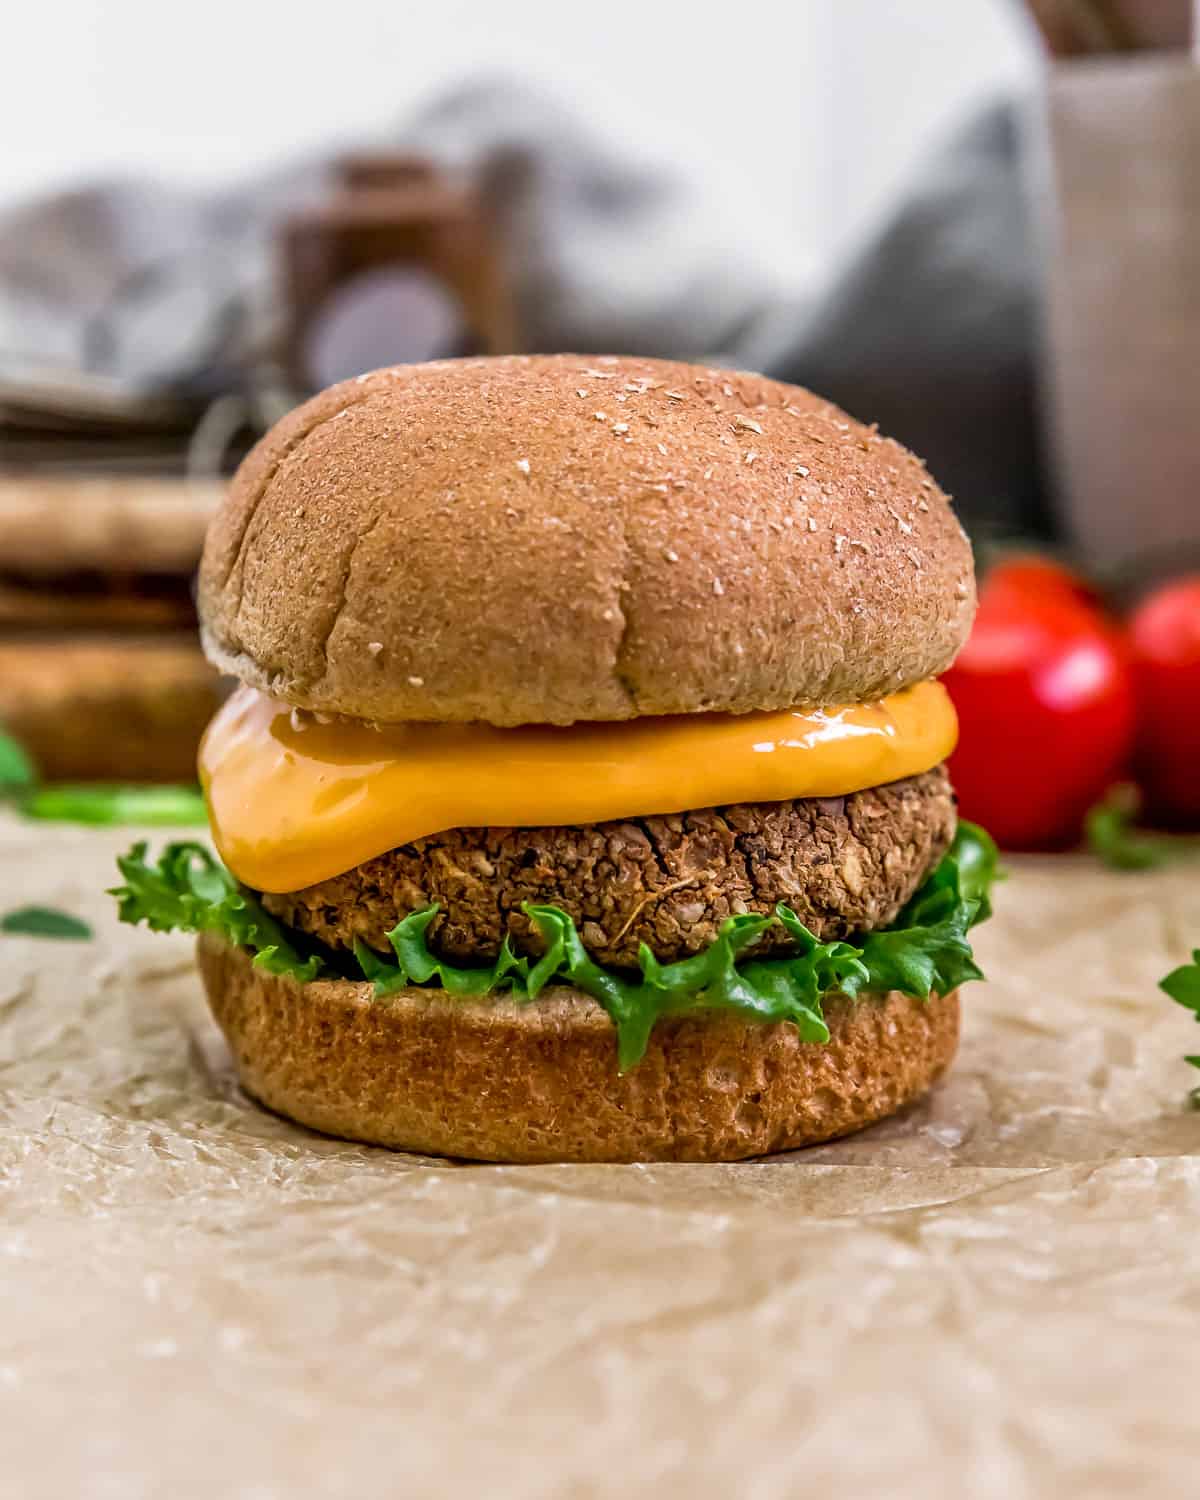
- Burger Option #3 – Nacho Cheese Burger: We made our Nut Free Vegan Nacho Cheese Sauce (or your favorite nacho cheese sauce). We laid down some lettuce on a burger bun bottom, followed by the Mexican Bean Burger and a generous portion of the nacho cheese sauce, then topped with the burger bun.
- Don’t have a Food Processor, but still want to make these Burgers?: If you do not have a food processor, but still want to make this burger. Do the following:
- Place the salsa onto the cutting board and finely mince the large chunks of salsa (tomatoes, peppers, onions). Then scoop up the minced salsa and juices – measure out ¼ cup. Place into a small bowl and mix in the flaxseed meal. Stir well. Set aside.
- Crush the crisp tortillas by placing them in a plastic bag and crush them by hand and place them into a large bowl.
- Drain and rinse the beans really well, then place them onto a cutting board and cut them into fine pieces, then place them into a large bowl with the crushed tortilla chips.
- Place all the remaining ingredients as well as the Salsa/Flaxmeal mix into the large bowl. Use your hands (or a hand-held potato masher) and vigorously mash the ingredients. The key is that you want some of the beans mashed and some semi-mashed to a mince. In other words, do not create complete mush with the beans. You should have a mixture of completely mushed ingredients as well as little flecks of minced beans visible. The mixture should come together very easily to form a burger without cracking. If it does not create a cohesive ball, then you need to mash some of it some more by squeezing the mixture tightly until it oozes out between of your fingers. Then try again to form a ball.
Leftovers and Freezing:
Leftovers will generally keep for 4-5 days in the refrigerator. Store in a covered container.
These burgers freeze well.
Pantry Products Used:
- Salsa: We used Tostitos Chunky Salsa (medium). Feel free to use your favorite mild or medium salsa.
- Sea Salt: Please adjust the sea salt based upon your family’s sea salt preferences and/or based upon dietary needs.
Kitchen Products Used:
- Food processor
- Baking Sheet
- Parchment paper
We certainly hope you give this fun appetizer a try! If you try it, please leave us a review! Post a picture on Facebook or Instagram and tag us! We would love to hear from you.
Print
Mexican Bean Burger
- Prep Time: 10 Minutes
- Cook Time: 35 Minutes
- Total Time: 45 Minutes
- Yield: 4-5 Burgers 1x
- Category: Dinner
- Method: Oven
- Cuisine: Mexican Inspired
- Diet: Vegan
Description
Healthy, easy, and satisfying, this Mexican Bean Burger is boasting all the must haves: a pow of spices, perfect texture, and oh-so-delicious.
Ingredients
Base Ingredients:
- 1 – [ 15 oz. can ] black beans, drained and rinsed *
- 1 – [ 15 oz. can ] chickpeas, drained and rinsed *
- 2 Tablespoons flaxseed meal
- ¼ cup salsa (mild or medium) *
- ½ cup crushed tortillas/tortilla chips *
- ½ teaspoon pure maple syrup (optional) *
Spice/Herb Ingredients:
- 1 teaspoon garlic powder
- 1 teaspoon onion powder
- 2 Tablespoons dried minced onion flakes
- ¼ to ½ chipotle powder (+/-) *
- 1 teaspoon smoked paprika
- ½ teaspoon cumin
- 1 teaspoon regular chili powder *
- ¼ to ½ teaspoon sea salt (+/-) *
Serving Ideas:
- Buns
- Lettuce
- Tomatoes
- Avocado/Guacamole
- Vegan Sour Cream
- Salsa
- Vegan Nacho Cheese Sauce
- Jalapeños
- Pickled Jalapeno Cilantro Sauce
- Red Onions
- See Blog Post for specific burger image details *
Instructions
- Preheat the oven to 350 F.
- Place all the Spice/Herb Ingredients into a small bowl, set aside.
- Line a baking sheet with parchment paper, set aside.
- Place the tortilla chips into a plastic bag and crush them, dump into a large bowl, set aside.
- Place the salsa and flaxseed meal into the food processor to break up the salsa finely, then dump it into the small bowl, set aside.
- Place the black beans and chickpeas into the food processor to break it up, pulse for about 20 seconds. Dump the contents of the food processor into a large bowl with the crushed tortilla chips.
- Then add all the remaining Base Ingredients, Spice/Herb Mix, and salsa/flaxmeal mix into the large bowl. Mix well by using your hands to evenly distribute all the ingredients.
- Take a ½ cup of the mixture, form a smooth ball, then flatten into a 1-inch thick burger and place on the parchment-lined baking sheet. Continue until all the burgers are made. (See notes on burger formation)
- Place in a preheated 350 F oven (center rack) and bake for 20 minutes, then flip, and bake for another 15 minutes. (See notes on baking)
- Remove from the oven and allow to sit for 5 minutes to set up before serving.
- Serve with Vegan Nacho Cheese Sauce or with mashed avocado, lettuce, sliced tomatoes and/or vegan sour cream.
Notes
*Please reference the blog post for Tips for Success, Pantry Items Used, Storage and Freezing, and Kitchen Products Used.
*Sea Salt: Please adjust the sea salt based upon your family’s sea salt preferences and/or based upon dietary needs.
*Servings: 4 to 5
This post contains affiliate links, and we may receive a very small commission if you purchase through those links at no additional cost to you. Thank you for supporting Monkey and Me Kitchen Adventures! For more information, see our disclosures here.

We made this tonight and the others were HUGE! We topped them with avocado, salsa, lettuce and a little non dairy plain yogurt. We enjoyed them and they had the right amount of flavor. My husband added some fresh jalapeños. Very filling! This recipe made 4 large patties (1/2 C mixture per burger).
Pretty fast putting it all together- I would make this again
Hi there Heather,
YAYYYY!! We are thrilled that you enjoyed this burger recipe. Thank you so much for the awesome review of this recipe.
-Ameera and Robin
I made these today after seeing them on Facebook. This was an easy recipe to make and I read the notes carefully. I made 5 burgers, rather on the smaller side. They did not get firm as you said they would. I turned them another time and gave them another 20 minutes. Perhaps its because I used the toaster over, but that’s what I’ve got. After they cool thoroughly, I’ll refrigerate and try again tomorrow. Maybe a brief heating in the air fryer will help. Great flavor.
Hi there Virginia,
We responded to your next comment below. Glad that you figured it out, that you accidentally left out the chips. Thank you.
-Ameera and Robin
EEKS, no wonder my burgers were not firm! I forgot the chips element. Sorry. Will try again. As Rosanne Rosannadana would say, “Never mind.” LOL!
Hi there Virginia,
Oh dear! Well that explains it. 😀 Hopefully, they will meet your expectations next time you make them. Thank you.
-Ameera and Robin