Description
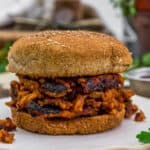
We can’t get enough of these Easy Burnt Ends BBQ Soy Curls; they’re pure barbecue heaven!
Ingredients
Scale
Ingredients:
- 1 – [ 8 oz. package ] soy curls *
- 2 ¼ cups water
- 1 ½ cups BBQ sauce, divided
Optional Serving Ideas:
- Extra BBQ sauce
- Sandwich buns
- Dill pickle slices
Instructions
- Place the water into a deep bowl, whisk in ¼ cup of BBQ sauce, mix well. Then place the soy curls into the bowl, toss around, and press down the soy curls into the water/BBQ sauce mix.
- Allow the soy curls to soak for 7 minutes. Important: Set a timer to ensure that the soy curls do not soak longer than 7 minutes. After 7 minutes, dump the soy curls into a strainer to drain off any excess water, using the palm of your hand, press down slightly on the soaked soy curls to allow them to release any excess water.
- Set the oven to high broil, place the oven rack to the 2nd highest position closest to the broiler element.
- Place the soaked and drained soy curls into a deep bowl, add 1 cup of BBQ sauce, mix well to evenly and thoroughly coat, then dump the BBQ covered soy curls in the center of a baking sheet. Starting from the center, press the soy curls outward to arrive at a single, cohesive layer (rectangle) of soy curls. Using a damp paper towel, carefully wipe up any BBQ sauce that is outside of the cohesive block of BBQ coated soy curls to prevent the pan from burning. See the blog photos for reference.
- Put the soy curls in the oven under the broiler element for 5 minutes. Watch them carefully, the BBQ coated soy curls will start to caramelize under the broiler. Reference the blog photos.
- After 5 minutes, remove from the oven, carefully flip the soy curls over, and create a cohesive, single layer (rectangle) of soy curls. Add ¼ cup of BBQ sauce on top of the soy curls and spread it over the soy curls using the back of the spoon. Using a damp paper towel, carefully wipe up any BBQ sauce that is outside of the cohesive block of BBQ coated soy curls to prevent the pan from burning. Be careful, the pan is hot.
- Place the BBQ soy curls back into the oven under the broiler rack for another 5 minutes to repeat the process of caramelization.
- After 5 minutes, remove from the oven and flip the soy curls over and over to mix them up. Allow the BBQ soy curls to set for 2 minutes on the baking pan. Serve and enjoy.
Notes
*Please reference the blog post for Tips for Success, Pantry Items Used, Storage and Freezing, and Kitchen Products Used.
*Sea Salt: Please adjust the sea salt based upon your family’s sea salt preferences and/or based upon dietary needs.
*Servings: 4 to 6